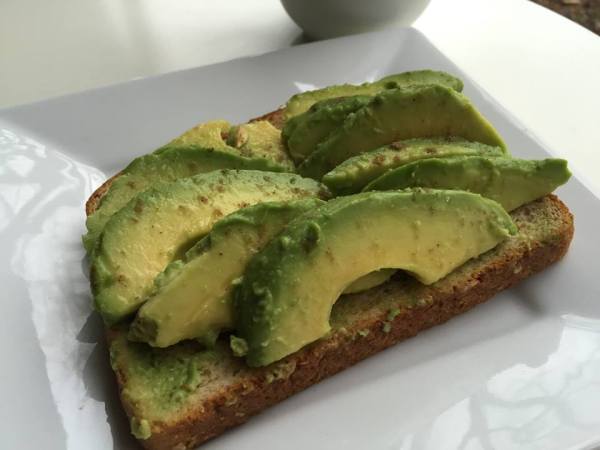
Avocado Toast
Mrs. Smith Cooks started in 2010 as a scrapbook of my cooking and a way to share the recipes that delighted me and my family. I still cook and experiment with recipes but don’t take as much time as I used to to share them on this blog. In the last several years my attention has focused more on children’s spirituality and the church, and I’m blogging at traci-smith.com more on those issues. There are still recipes I’d like to share from time to time, though, and for now, I’m going to post those both at mrssmithcooks.wordpress.com and at traci-smith.com, though maybe I’ll merge them in the future. So… avocado toast.
There are so few ingredients in avocado toast, it hardly counts as a recipe. Then again, toast is super trendy right now, and the story of how the artisanal toast trend came to be is so much deeper than you’d think.
This avocado toast is worth sharing, then, because it’s one of those things where the total is more than the sum of its parts: avocado, hearty bread, a squeeze of lemon juice, good salt, and a sprinkle of cumin. That’s it. Somehow, though, those ingredients combine in this super amazing way and creates a breakfast or snack you’ll want to eat every. single. day. (Not that I do that, of course, hee hee.) Give it a try, watch something so simple become your favorite breakfast.
A few notes:
- Though I’m not a super foodie, I have noticed the fun in trying different salts. For this toast, I use himalayan sea salt. Sounds fancy, but it’s not that expensive. I buy from myspicesage.com, but here’s some on Amazon.
- The heartier and thicker the bread, the less soggy and droopy the end result will be
- When the star of the show is avocado, one had best be sure that the avocado is perfectly ripe. Avocados can be finicky, it seems that the window between underripe and overripe is really narrow. If you’re interested in reading an article (with 65 comments!) about getting the perfect avocado, try this one. Another avocado PSA: never refrigerate your avocados!
Avocado Toast, One Slice
Ingredients:
- One slice hearty bread
- 1/2 of a perfectly ripe avocado, sliced (if you’re taking a picture of it, otherwise just mushed on the bread)
- Generous squeeze of lemon or lime juice
- Big Pinch of sea salt
- Teeny pinch of cumin
Instructions: (ha! writing instructions for toast! It’s amazing, I’m not kidding!)
- Toast the bread as dark as you can without burning it (helps it to hold up under the weight of the avocado)
- Top with avocado, squeeze of juice, pinch of salt and pinch of cumin. Tip for the cumin: put your fingers up really high and sprinkle from up there so the cumin doesn’t fall down in one big glob. I’m serious about this. I make this toast nearly every day and I was getting tired of the cumin glob.
Source: Adapted/invented from the avocado toast I love to eat at Rosella Coffee in town
Blueberry Lime Sauce for Waffles, Pancakes and Ice Cream!

I make blueberry sauce a lot. So much, in fact, that I’ve had a chance to try a variety of different recipes and choose a favorite. (Note: it is probably not a coincidence that my favorite one has the added addition of butter. Ahem.) Most of these recipes include (in addition to the obvious blueberries) cornstarch, some sort of citrus juice and zest, and sugar. It’s blueberry season, so I’ve been making this recently. It takes about 10 minutes to make, so if you’re at a loss for what to bring to someone’s house for a summer pool party, just grab some vanilla ice cream and bring some of this sauce. People will be licking it off of their plates! We eat it on waffles, stir it in to yogurt, and put it on pancakes. I also bring it as a sauce for my favorite any-berry cake.
Summer Blueberry-Lime Sauce
Ingredients:
- 1 pint blueberries (or 12 oz bag of frozen)
- 1/3 cup granulated white sugar
- 1/4 cup freshly squeezed lime juice (we use key limes)
- 1/2 t. lime zest
- 1 T cornstarch
- 1 T water
- 2 T butter
Procedure
- In a small bowl, stir together the water and cornstarch until a paste is formed, and set aside
- Combine berries, sugar, lime juice and zest in a small nonreactive pan* (HERE’s a good one)
- Cook over medium-high heat, stirring constantly until the berries begin to soften a little and release their juices (2-3 minutes)
- Stir in the prepared cornstarch mixture and continue to stir until the sauce thickens, about 3-5 minutes more.
- Turn off the heat and stir in the butter until its melted.
Voila! Amazing blueberry sauce!
*what’s a nonreactive pan, and why do you need one? Here’s a good article about it…
FCC Disclosure: This post contains affiliate links which keep traci-smith.com running.
Caramelized Onions in the Slow Cooker

There are a few “basics” I make all of the time but never post on this blog because unlike the last flashy and fancy bourbon pumpkin cheesecake recipe I posted, they are, well, basic. I have a few of these, though, that I’m going to post, not because they are so revolutionary, but because the technique is so simple and maybe different from the way that it’s usually done. (Cooking beans in the oven without soaking them? Yes, yes, that’s how I make them all the time now, more on that in another post.)
Ok, let’s talk about caramelized onions, shall we? Here’s the thing. Recipes lie about caramelized onions. It takes a long, long time to truly caramelize them, but a caramelized onion is an amazing thing in the kitchen. I use them to make mujaddrra (yet another recipe I want to share sometime, harumpfh) and tacos with black bean and sweet potato (I actually did share that recipe a long, long time ago). I also stir them into omelets or throw them in to any dish that needs a little perking up.
I love to make them in the slow cooker. For one, they get truly caramelized, for another, they take hardly any work at all, just cut them up, throw them in the slow cooker and wait. (The cutting of the onions the hardest part of the job, for me. Onion goggles, anyone? I seriously would use these if I had them, and I’m not joking.) Ok, without further ado…
Caramelized Onions in the Slow Cooker
Ingredients:
3-5 pounds yellow onions (enough to fill your slow cooker 3/4 of the way full)
3T olive oil or melted butter
1/2 t. salt
Directions:
1. Slice all the onions. The original recipe I used says to “thinly” slice them. I think it depends on how you interpret the word “thinly” — don’t make them paper thin or they will stick to the side and burn. I make them what I call “medium thin” — hard to quantify… don’t over think them. Definitely not thick slices, but don’t worry about getting them too thin.
2. Toss with olive oil and salt
3. Cook for 8-10 hours on low. This might take some fiddling with for your own slow cooker. For me, I cook it on low for the first 8 hours, then leave it on “warm” for an additional couple of hours.
4. optional 4th step – cook for an additional 3 hours with the lid ajar. The original recipe says this will result in “jammier” caramelized onions. I’ve made these several times and have never tried it. Just cooking on low for 8-10 hours results in beautiful, deeply caramelized onions.
About stirring — when I have these going in the house, I stop by “from time to time” (If I’m home and not at work) and give them a stir. If I’m not home, I don’t stir them. When I don’t stir them, there are often a few burned ones stuck to the side that I have to throw away, but it’s not a big deal.
To me, there’s something sort of spiritual about these onions. They are a reminder that pungent, strong and humble yellow unions become sweet, tender and complex with heat and time. (Lots and lots of time). Isn’t that true of life?
Original source: The Kitchn
Gluten Free Bourbon Pumpkin Cheesecake

It’s been awhile since I’ve posted on MSC and this is the perfect recipe to come back to. Wow. So good. We’ve been on a cheesecake kick over here at casa Cabarcas-Smith. I’m planning on making a cheesecake for my birthday later this week, and I’m tempted to just make this one again because it was so. good. It’s not hard, but there are quite a few steps — make the crust, let it cool, make the cake, make the topping. It’s worth it. I’ll keep you posted on the birthday cake. For now, enjoy this one. Make it for thanksgiving or just because.
A few pointers:
* I didn’t put on all of the topping when I made this and wished I had. When it bakes it soaks into the cake… just use the whole TWO CUPS of sour cream. Whatever. This dessert has three blocks of cream cheese and BURBON in addition to butter, heavy cream and two kinds of sugars. This is not health food, people. Slather on the sour cream and be happy.
* Another benefit of the topping = it covers up the cracks that form on the top.
* This cheesecake is NOT coming off the bottom of the springform pan in one piece. Don’t even try it. Just serve from the pan bottom. (The greasing of the pan will help you get the individual slices off, but I would have a HEART ATTACK trying to transfer the whole thing. No. Don’t go there. 😉
* Yes, you can leave the bourbon out, but if you do, you won’t be able to shadily go to the liquor store and buy the teeny tiny bottles and put them in your purse. That’s what I did. Good times.
* Gluten free ginger snaps — I made this modification for Elias because he’s Mr. Gluten free. People loved the crust the most.
Bourbon Pumpkin Cheesecake
Serves 12
For the crust
3/4 cups gluten free gingersnaps
1/2 cup pecans, finely chopped
1/4 cup packed light brown sugar
1/4 cup white sugar
1/2 stick (1/4 cup) unsalted butter, melted and cooled
(extra butter for greasing pan)
For the filling
1 1/2 cups canned solid-pack pumpkin
3 large eggs
1/2 cup packed light brown sugar
2 T heavy cream
1t vanilla
1T bourbon
1/2 cup white sugar
1 T cornstarch
1 1/2 t cinnamon
1/2 t freshly grated nutmeg
1/2 t ground ginger
1/2 t salt
3 (8 ounce) packages cream cheese, softened
For topping
2 c sour cream
2 T white sugar
1 T bourbon
Garnish: pecan halves
Crust
1. Grease the bottom of a 9 inch springform pan with butter
2. Stir together cookie crumbs, pecans, white sugar, brown sugar and melted sugar until well combined. The mixture should look like wet sand. Press into the bottom and 1/2 inch up side of the pan.
3. Chill crust for 1 hour.
Filling
1. Preheat oven to 350 degrees F
2. Whisk together, pumpkin, eggs, brown sugar, vanilla, and bourbon until combined.
3. In a separate bowl (bowl of stand mixer if you have one) stir together white sugar, cornstarch, spices and salt.
4. To the sugar mixture, add cream cheese and beat at high speed until the mixture is creamy and smooth (about 3 minutes) reduce speed to medium, add the pumpkin mixture and beat an additional minute.
5. Pour the filling into the crust, smooth the top and bake until the center is set like jello. It can wiggle a little, but shouldn’t be soupy. (50 – 60 minutes.) Leave cake to cool slightly while making the topping (leave oven on)
Topping
1. Mix together sour cream, bourbon and sugar
2. Spread on top of cake (it will look like a lot, but use all of it)
3. Bake for 5 more minutes at 350.
4. Cool cheesecake with topping in the rack for at least 3 hours. Transfer to fridge.
Serve cold or at room temperature.
Source: Adapted from Smitten Kitchen (one of my go to sites for awesome recipes.)
Vanilla Dutch Baby (Puffed Pancake)

In recent weeks, I’ve been making this oven baked, puff pancake (aka a Dutch Baby) at least 3x a week for my boys and I. It’s really easy to whip up, doesn’t create a lot of mess, and fills up two toddlers and a mama just fine. Elias doesn’t get any because it’s got regular flour in it (sad face). Awhile ago I posted about David Eyre’s pancake which is very similar to this in preparation, but comes out more crepe-like and less substantial. This one comes out more custardy and seems to suit us a little better these days. It’s so easily customized. We’ve put lemon or orange zest in the batter or cinnamon. I’ve never tried chocolate chips, but someone totally should.
As for what to put on top, most days we eat it with a little powdered sugar and lemon juice, or just plain for the boys, or with some fruit on top. It doesn’t require syrup like regular pancakes do, but I’m sure syrup lovers won’t use that as a deterrent to throwing a little bit of syrup on top.
I also love to serve this to the boys with some sausage or bacon for a quick and easy supper!
Vanilla Dutch Baby, Adapted from Melissa D’Arabian
Ingredients
3 eggs
3/4 cup milk, warmed in the microwave for 20-30 seconds
3 TBS salted butter
t TBS granulated sugar
3/4 cup flour
1 tsp vanilla extract
Toppings: powdered sugar, lemon juice, fruit of your choice.
Procedure:
1. Preheat oven to 400 degrees.
2. Put the butter in an oven-safe frying pan (mine’s about 12 inches, I think) and put in the oven to melt while you prepare the batter
3. Whisk eggs and warm milk together for about 30 seconds – 1 minute until the eggs are no longer stringy
4. Whisk in vanilla and flour and whisk until there are no lumps
5. Remove melted butter from the oven and pour most of it (about 3/4s) into the batter, swirl the rest around to coat the pan
6. Pour batter into hot pan
7. Bake at 400 degrees for 15-20 minutes until the pancake is puffed and golden
8. Top with powdered sugar, lemon juice and fruit of your choice.
YUM.
Takeout Style Chicken Fried Rice

When Elias and I were first married, I learned very quickly that he didn’t consider a meal a full meal unless there’s rice. We eat rice in our home every single day. While I learned the secrets of making rice and it’s not hard, I did wonder out loud (on Facebook) awhile ago if I should get a rice cooker. The response was pretty one sided “Yes! Get one! I love mine!” People seemed to be passionate about their rice cookers. One friend was the lone dissenter “I don’t really use mine. Wish I could trade it for one of your books.” It sounded like a great deal to me, and so we made the swap.
The verdict? I love the rice cooker. I really do! What’s easier than making rice? Nothing… except making it in a rice cooker. I think the thing I like about it is that it frees up mental space. I just throw it in there and turn it on and then I’m back to the business of making the “fun” food.
Because of my over zealousness with the new rice cooker, I had a big pot of white rice sitting in the fridge. After a few days it gets a little dried out and not so exciting, so I decided to make chicken fried rice. It seriously cooks up in 15 minutes, and it was so tasty. In addition to being absolutely no trouble to throw together and really tasty, it’s cheap and uses up whatever’s in the fridge (within reason).
Take Out Chicken Fried Rice
Ingredients
3 cups of leftover rice
1 and 1/2 cups cooked cubed (or shredded) chicken
1 cup frozen peas and carrots (total = 1 cup. 1/2 cup of each)
1 onion, chopped
2 cloves garlic, minced
2 eggs
3 T neutral flavored oil (vegetable or sesame, if you have it)
1/4 cup soy sauce
1 tsp. ginger paste (optional)
Directions
- Heat oil in a large pan on medium-heat
- Add vegetables (onion, peas, carrots) and fry for 3-5 minutes, or until tender
- Crack eggs into pan, and scramble them in to the vegetables
- Add, chicken, rice, and ginger paste to the pan and stir to combine for two minutes
- Finish by adding in soy sauce
Source: Adapted from Rachel Schultz
Date Night Chicken

Ground Beef and Lentil Soup with Rice

Finally, finally, it’s cold enough in San Antonio for soup. (Not that being cold is a requirement in our house for soup, we eat soup in the summer, too, because we love soup.) Still, there’s nothing better than cozying up to a nice steamy bowl of soup on a cool day, and this soup is perfect snuggle up comfort food. I’m in the mood for a top five list, so here we go. Top five reasons to love this soup:
1. Comforting, filling and cheap! (three reasons in one)
2. The balsamic vinegar at the end gives it a little bit of a “hmm… yum… what’s in this soup?!” quality.
3. Super easy and quick to make
4. If you use extra lean ground beef, it’s pretty good for you.
5. (Should be #1) It’s lick-the-bowl delicious.
I adapted this soup to make it a few less steps than the original recipe calls for.
Ground Beef and Lentil Soup with Rice
Ingredients:
1 lb. ground beef
2 tsp. olive oil
1/2 cup chopped onion
1/2 cup chopped celery
1/2 cup chopped carrots
1 T minced garlic
1 T dried parsley
1 tsp. dried thyme or 3 fresh sprigs of fresh time
1/2 tsp. ground cumin
4 c. low sodium beef stock
2 c. low sodium chicken stock
2 cups water
plus more as needed
2/3 cup brown lentils
1/2 cup rice
salt and fresh ground black pepper to taste
2 T balsamic vinegar
Procedure
1. Heat 2tsp. olive oil in a frying pan and cook the ground beef until it’s well browned. Break up into small pieces and transfer to a large pot.
2. Add another tsp. of olive oil to the pan and add carrots, onions and celery. Saute until the veggies are starting to soften (about 5 minutes). Add the garlic, thyme, cumin, and parsley and saute for another 2 minutes.
3. Transfer the veggies to the pot. Add the 2 cups of water to the frying pan to swish out the bits of veggies and garlic stuck to the pan and add that water to the soup pot as well.
4. Add beef broth, chicken broth and lentils and rice to the soup pot and simmer on low for about an hour.
5. Taste the soup, if the flavor seems too salty or concentrated, add a bit of water, if it seems underseasoned, add salt.
Individual Key Lime Cheesecakes (gluten-free)

My birthday was last Tuesday…. Happy Birthday to me! I offered to make my own birthday meal because I enjoy cooking and knew it would take some stress off of E to not have to do it. I knew I would make something lemon or lime flavored. While I certainly enjoy chocolate. (See here, here, and here) I love lemon and lime desserts even more. (case in point: here, here and here). I’m the one at the dessert buffet happily loading up my plate with lime tartlets and lemon bars while my friends are devouring the chocolate cake with chocolate ganache and a side of chocolate. In our house, birthday cakes are always gluten free so husband/dad can enjoy them too.
I will confess that I was hoping to make a more elaborate key lime dessert for my birthday, but (insert standard disclaimer about good intentions, being too busy, blah blah blah).
This dessert doesn’t take much time to whip up, and the results are very satisfying. Limey and creamy! The gingersnap crust gives it a little extra something, but it still has that graham cracker crust feel that we all associate with key lime pie.
This cheesecake can easily be made as one large cheesecake, just increase the baking time. Also, to further simplify, pour the filling into a pre-made pie crust.
Happy 35 to me!
Individual Key Lime Cheesecakes
Ingredients:
1. 8 oz gluten-free gingersnap cookies
2. 1/2 stick butter
3. 16 oz. cream cheese, softened
4. 1/2 cup sugar
5. Two large eggs
6. 1/4 cup freshly squeezed key lime juice
7. 1 T. grated key lime zest
8. 1 T vanilla
Procedure
1. Preheat oven to 350 degrees
2. Prepare muffin tin with 12 paper liners
3. Make crust
i. pulse the gingersnaps in a food processor until they are the consistency of sand, and transfer to a bowl.
ii. add the melted butter and stir. The mixture will not be very wet but will hold together loosely.
iii. spoon the crust in to the muffin liners and press down to form the crust. (Note: I wanted a fairly thin crust on mine, so I used about 2 T of crust per cheesecake which resulted in some leftover crumbs. We’ve been sprinkling the leftover crumbs on pancakes and yogurt to use them up. Alternatively, you could make a thicker crust.)
4. Make the filling
i. with a stand mixer, mix the cream cheese, sugar, lime juice, zest, and vanilla until thoroughly combined
ii. add eggs one at a time and mix until just combined
5. Divide filling equally among the prepared muffin tins.
6. Bake at 350 for 18-22 minutes or until the filling is just set (it’s ok if it wobbles a tiny bit in the center)
7. Refrigerate for at least 3 hours before enjoying.
Source: Filling adapted from Kraft Recipes
Torticas de coco / Mini Coconut Cakes

This weekend, in honor of our Colombian visitor, I wanted to make a few Colombian treats for him and Elias to share at one of the speaking opportunities. I made three different Colombian sweets, none of which I’ve made before.
Behind door number one was a dish called enyucado. My version was a disaster. Complete and utter fail. Sweet Elias hemmed and hawed before I got it out of him that “No, this tastes nothing like what it should.” Don’t know what went wrong, but I’ll be doing some research.
Behind door number two: edible, but not what I was hoping for. Dulce de leche cookies. They tasted fine, but looked sloppy. I’ve double and triple checked the recipe, but something was definitely not right there. More research…
Behind door number three: these mini coconut cakes. Win! They are sweet and full of coconut flavor and go really well with a cup of coffee. I made them in mini muffin tins which made them just the right size for a taste. Unlike the disastrous enyucado and the cookies, these also store really well in an airtight container. Another advantage to these? One bowl.
Torticas de coco – Makes 36 mini torticas
Ingredients
4 cups of shredded, sweetened coconut
1 cup all purpose flour
2 eggs, beaten
1 and 1/2 tsp baking powder
1 tsp vanilla extract
generous pinch of salt
Procedure
1. Preheat oven to 350 degrees and line molds with paper liners
2. Mix all ingredients together until well combined. The mixture will be rather stiff and firm. (not soupy)
3. Fill paper lined cups to heaping. (These rise, but not much)
4. Bake until set and golden brown, 12-18 minutes
Source: Adapted from My Colombian Recipes
